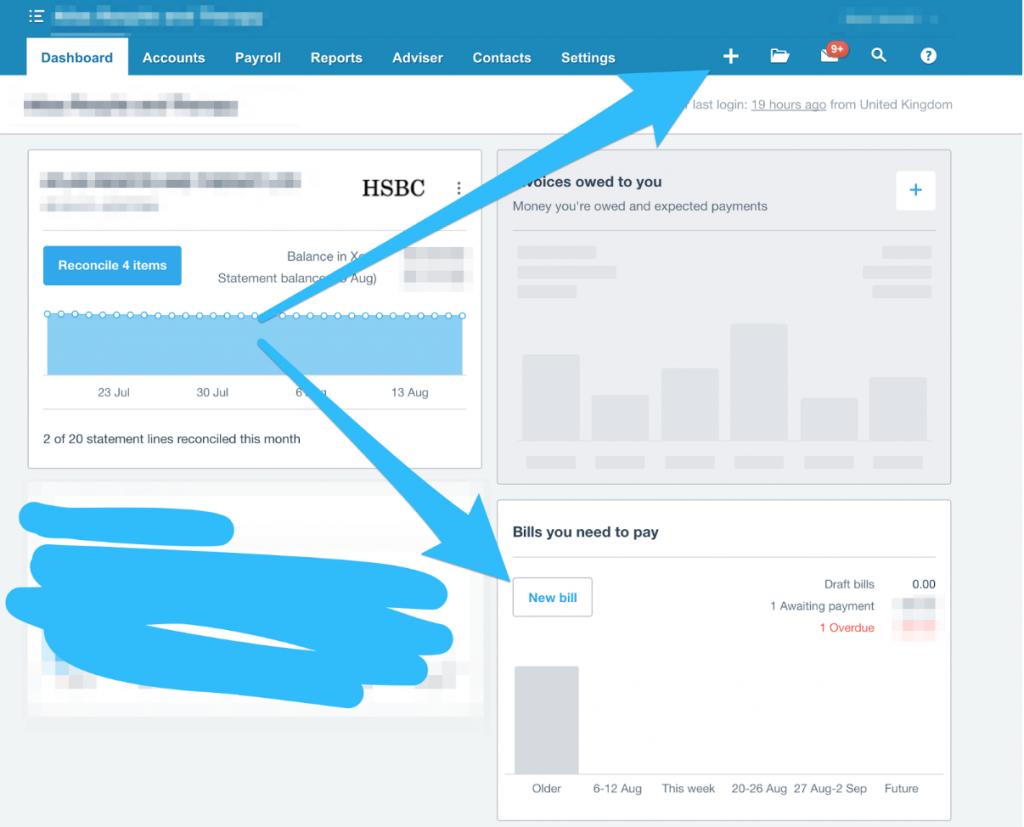
Use the + sign (“Bill”) or the “New Bill” button to quickly create a new bill:

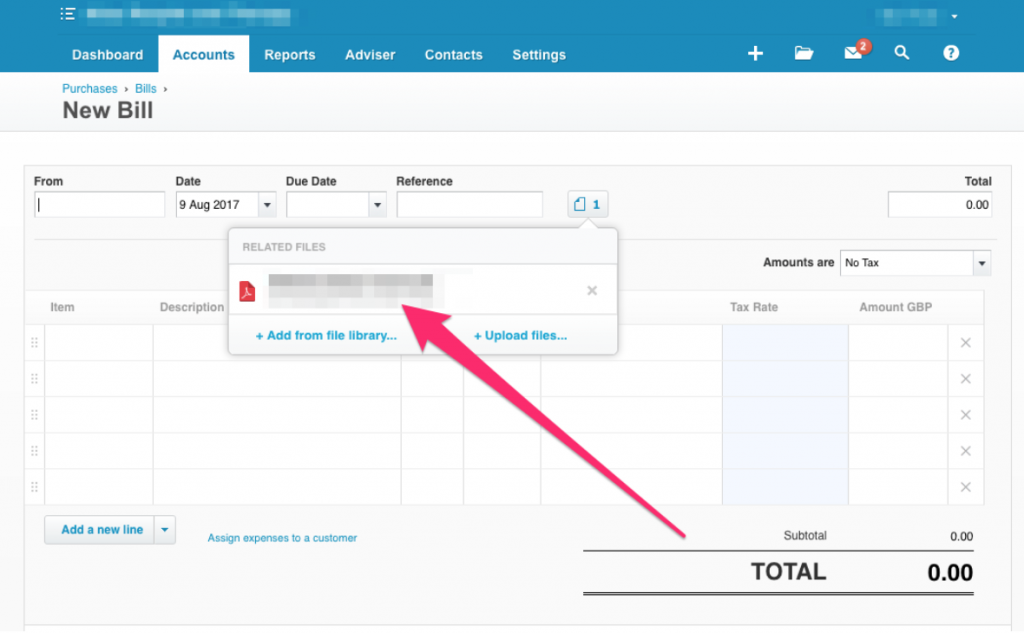
You should now drag and drop a copy of the invoice onto this page, once you have done this it should look like this (you can also add a file previously uploaded to the Xero Library):
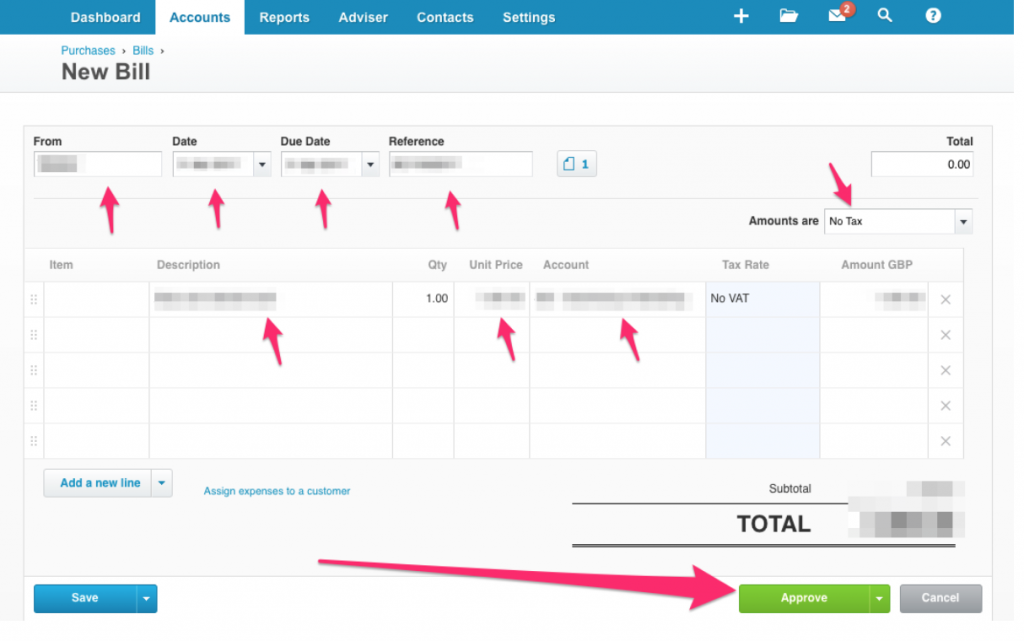
Now you should enter the details of the invoice, making sure you enter ALL of the following:
- Who the invoice is from in the ‘from’ section
- The invoice date and due date (if there is no due date then please enter one at the invoice date) in the ‘Date’ and ‘Due Date’ sections
- The invoice or reference number in the ‘Reference’ section
- A brief description of what the invoice is for (i.e. ‘advertisement campaign’) if the ‘Description’ column
- Enter the value of the invoice in the ‘Unit Price’ column
- If there is VAT on the invoice (and you’re VAT registered) then you can select ‘Tax Inclusive’ from the dropdown menu ‘Amounts are’ and then select the rate of VAT (usually ‘20% VAT on Expenses’) in the ‘Tax Rate’ column, then please ensure that the VAT listed on the invoice matches the VAT calculated by Xero. If you’re not VAT registered, enter the gross amount and leave as No VAT.
- Select the account which the invoice relates to in the ‘Account’ column, if you are unsure then select ‘General Expenses’ – or save as a draft and ask Love Accountancy
The screenshot below should be a guide to what information needs to be entered:
Once you have finished click on the approve button, the invoice should now be added to Xero!!!


