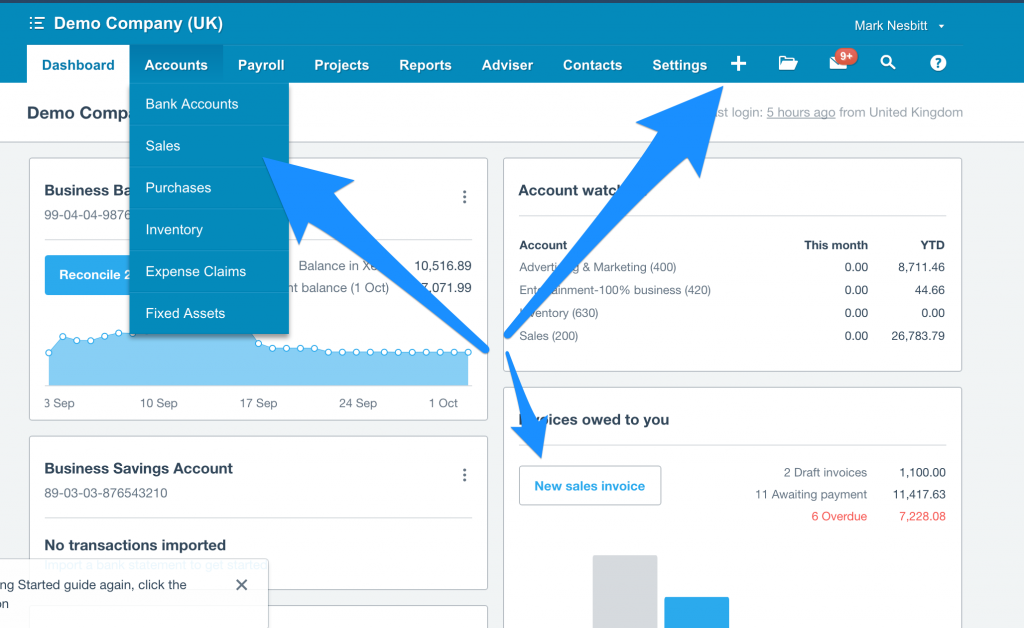
From the Xero Dashboard you have three options to create a new sales invoice.
- Quick add (+ sign in top right)
- Quick add (Invoice box in the dashboard)
- Long add – useful for reoccurring invoices, quotes and credit notes – Go to “Accounts” in the top bar
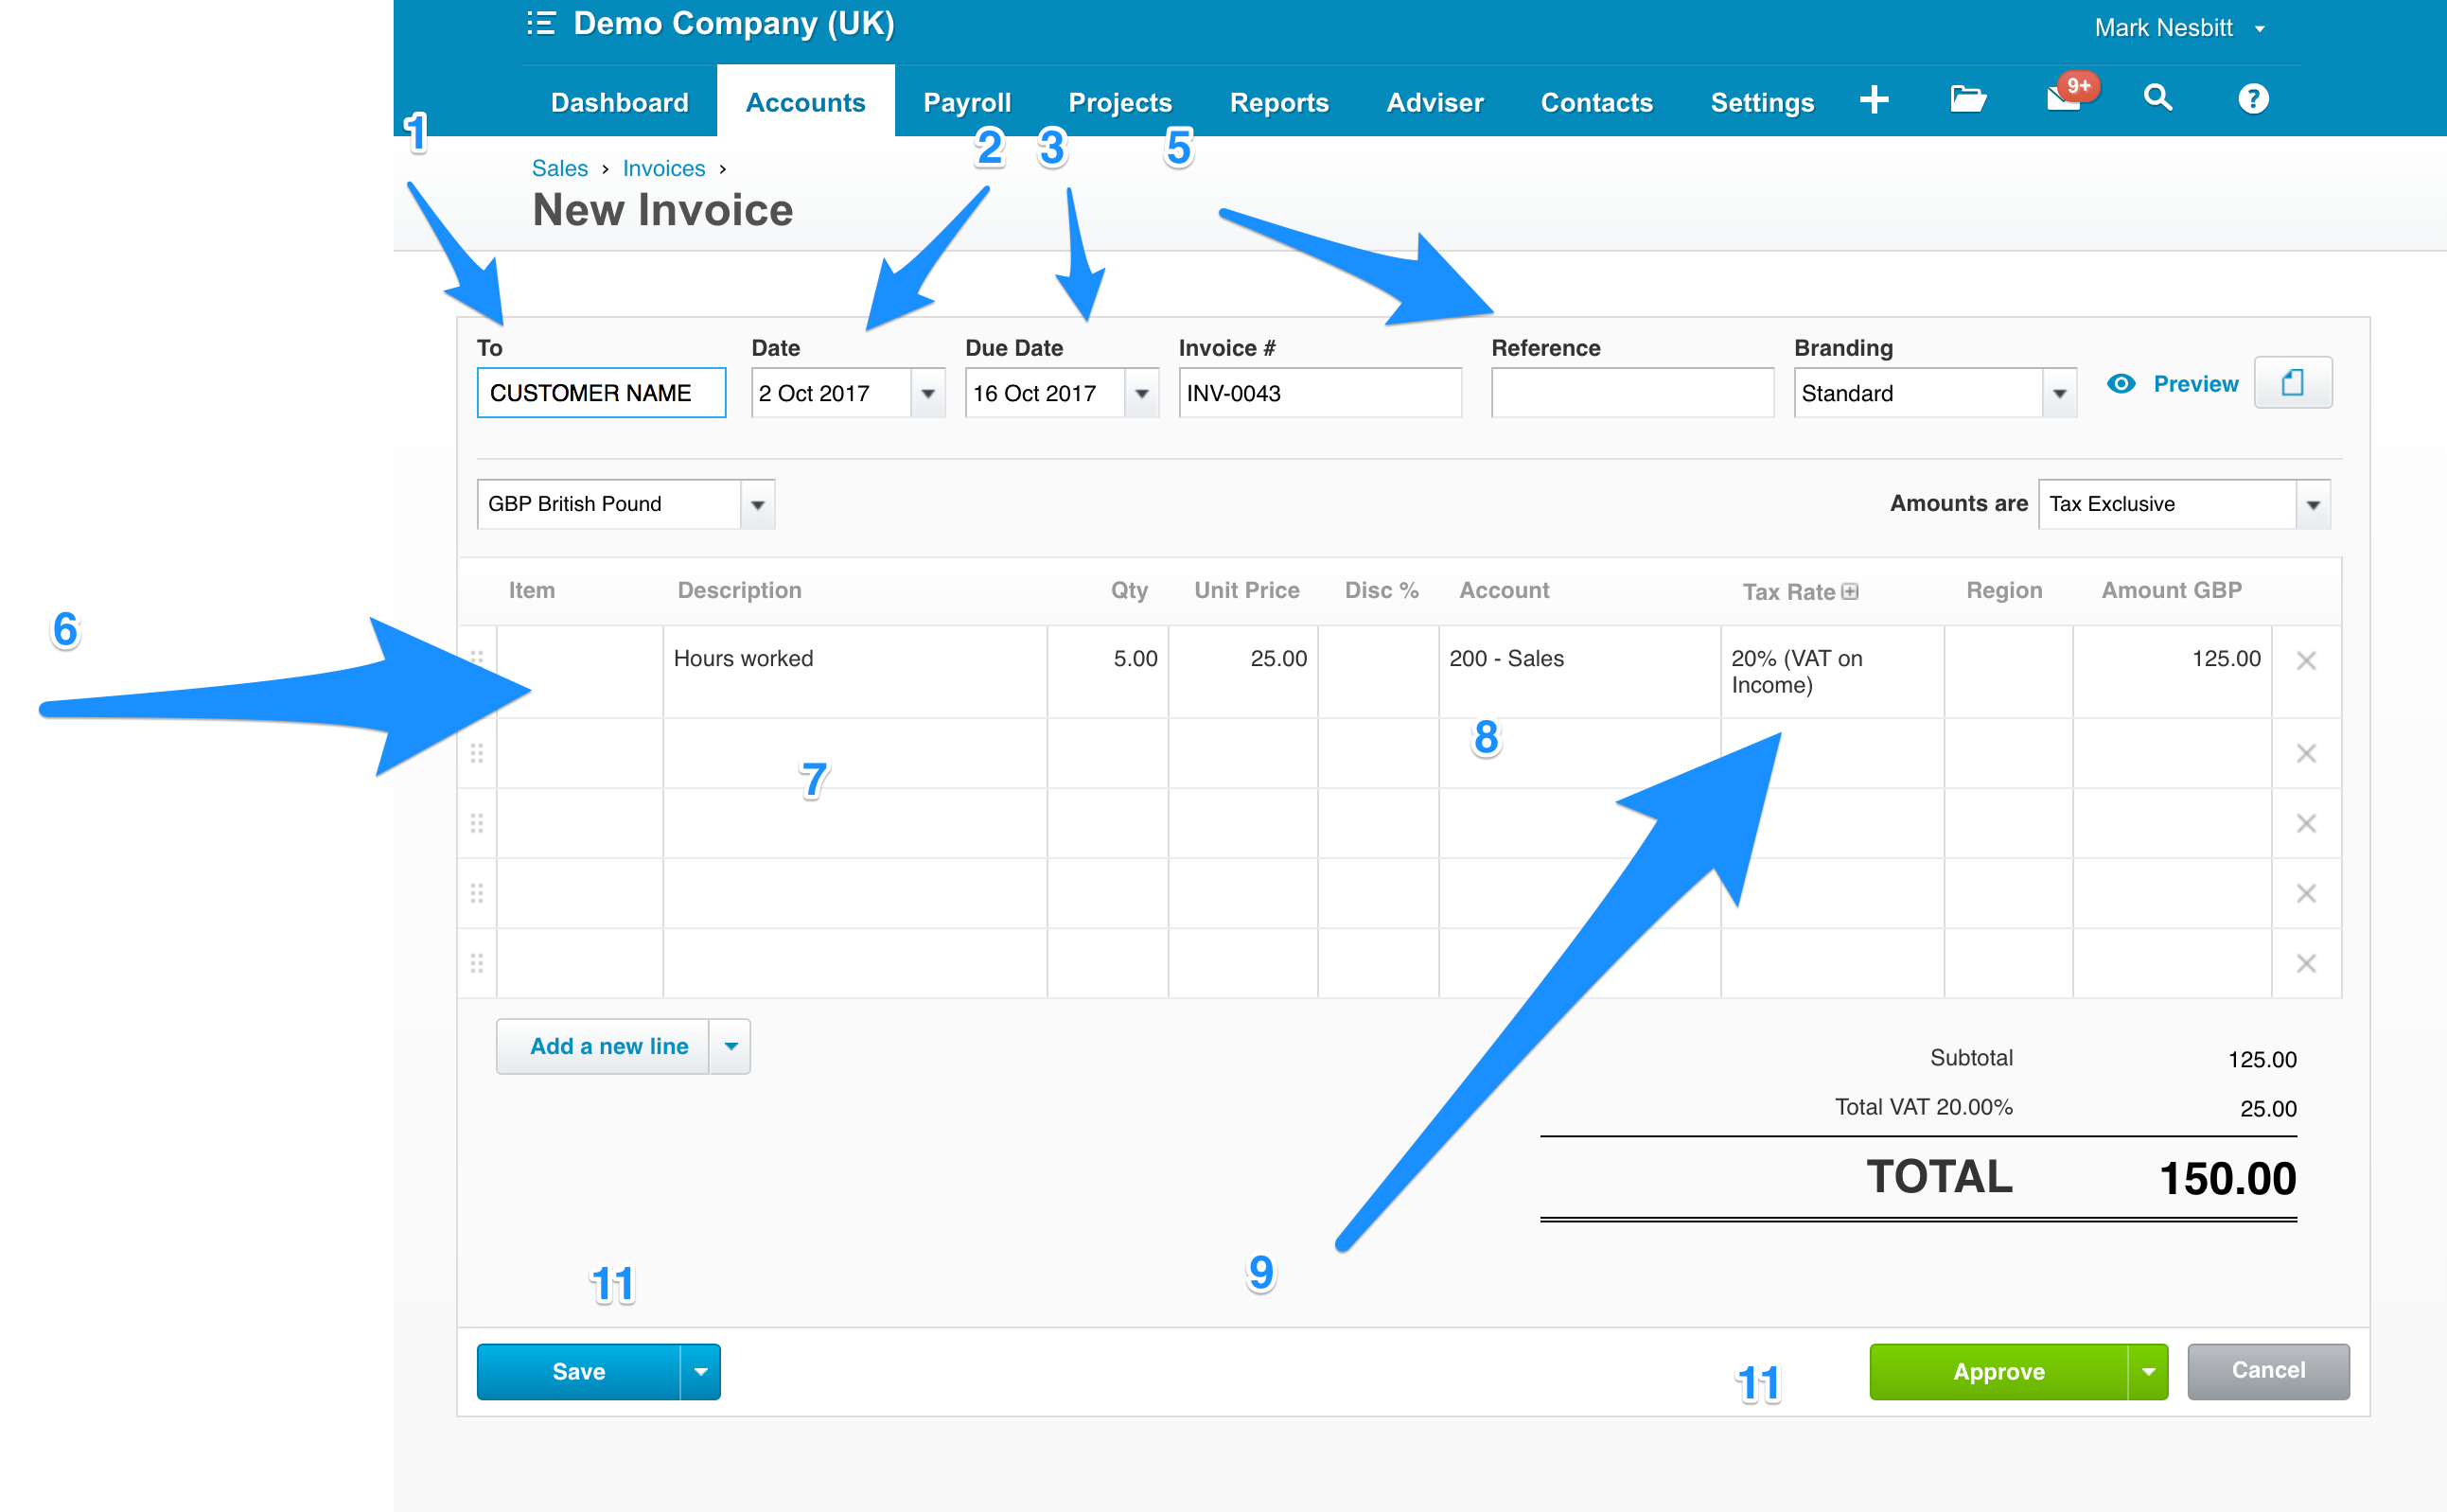
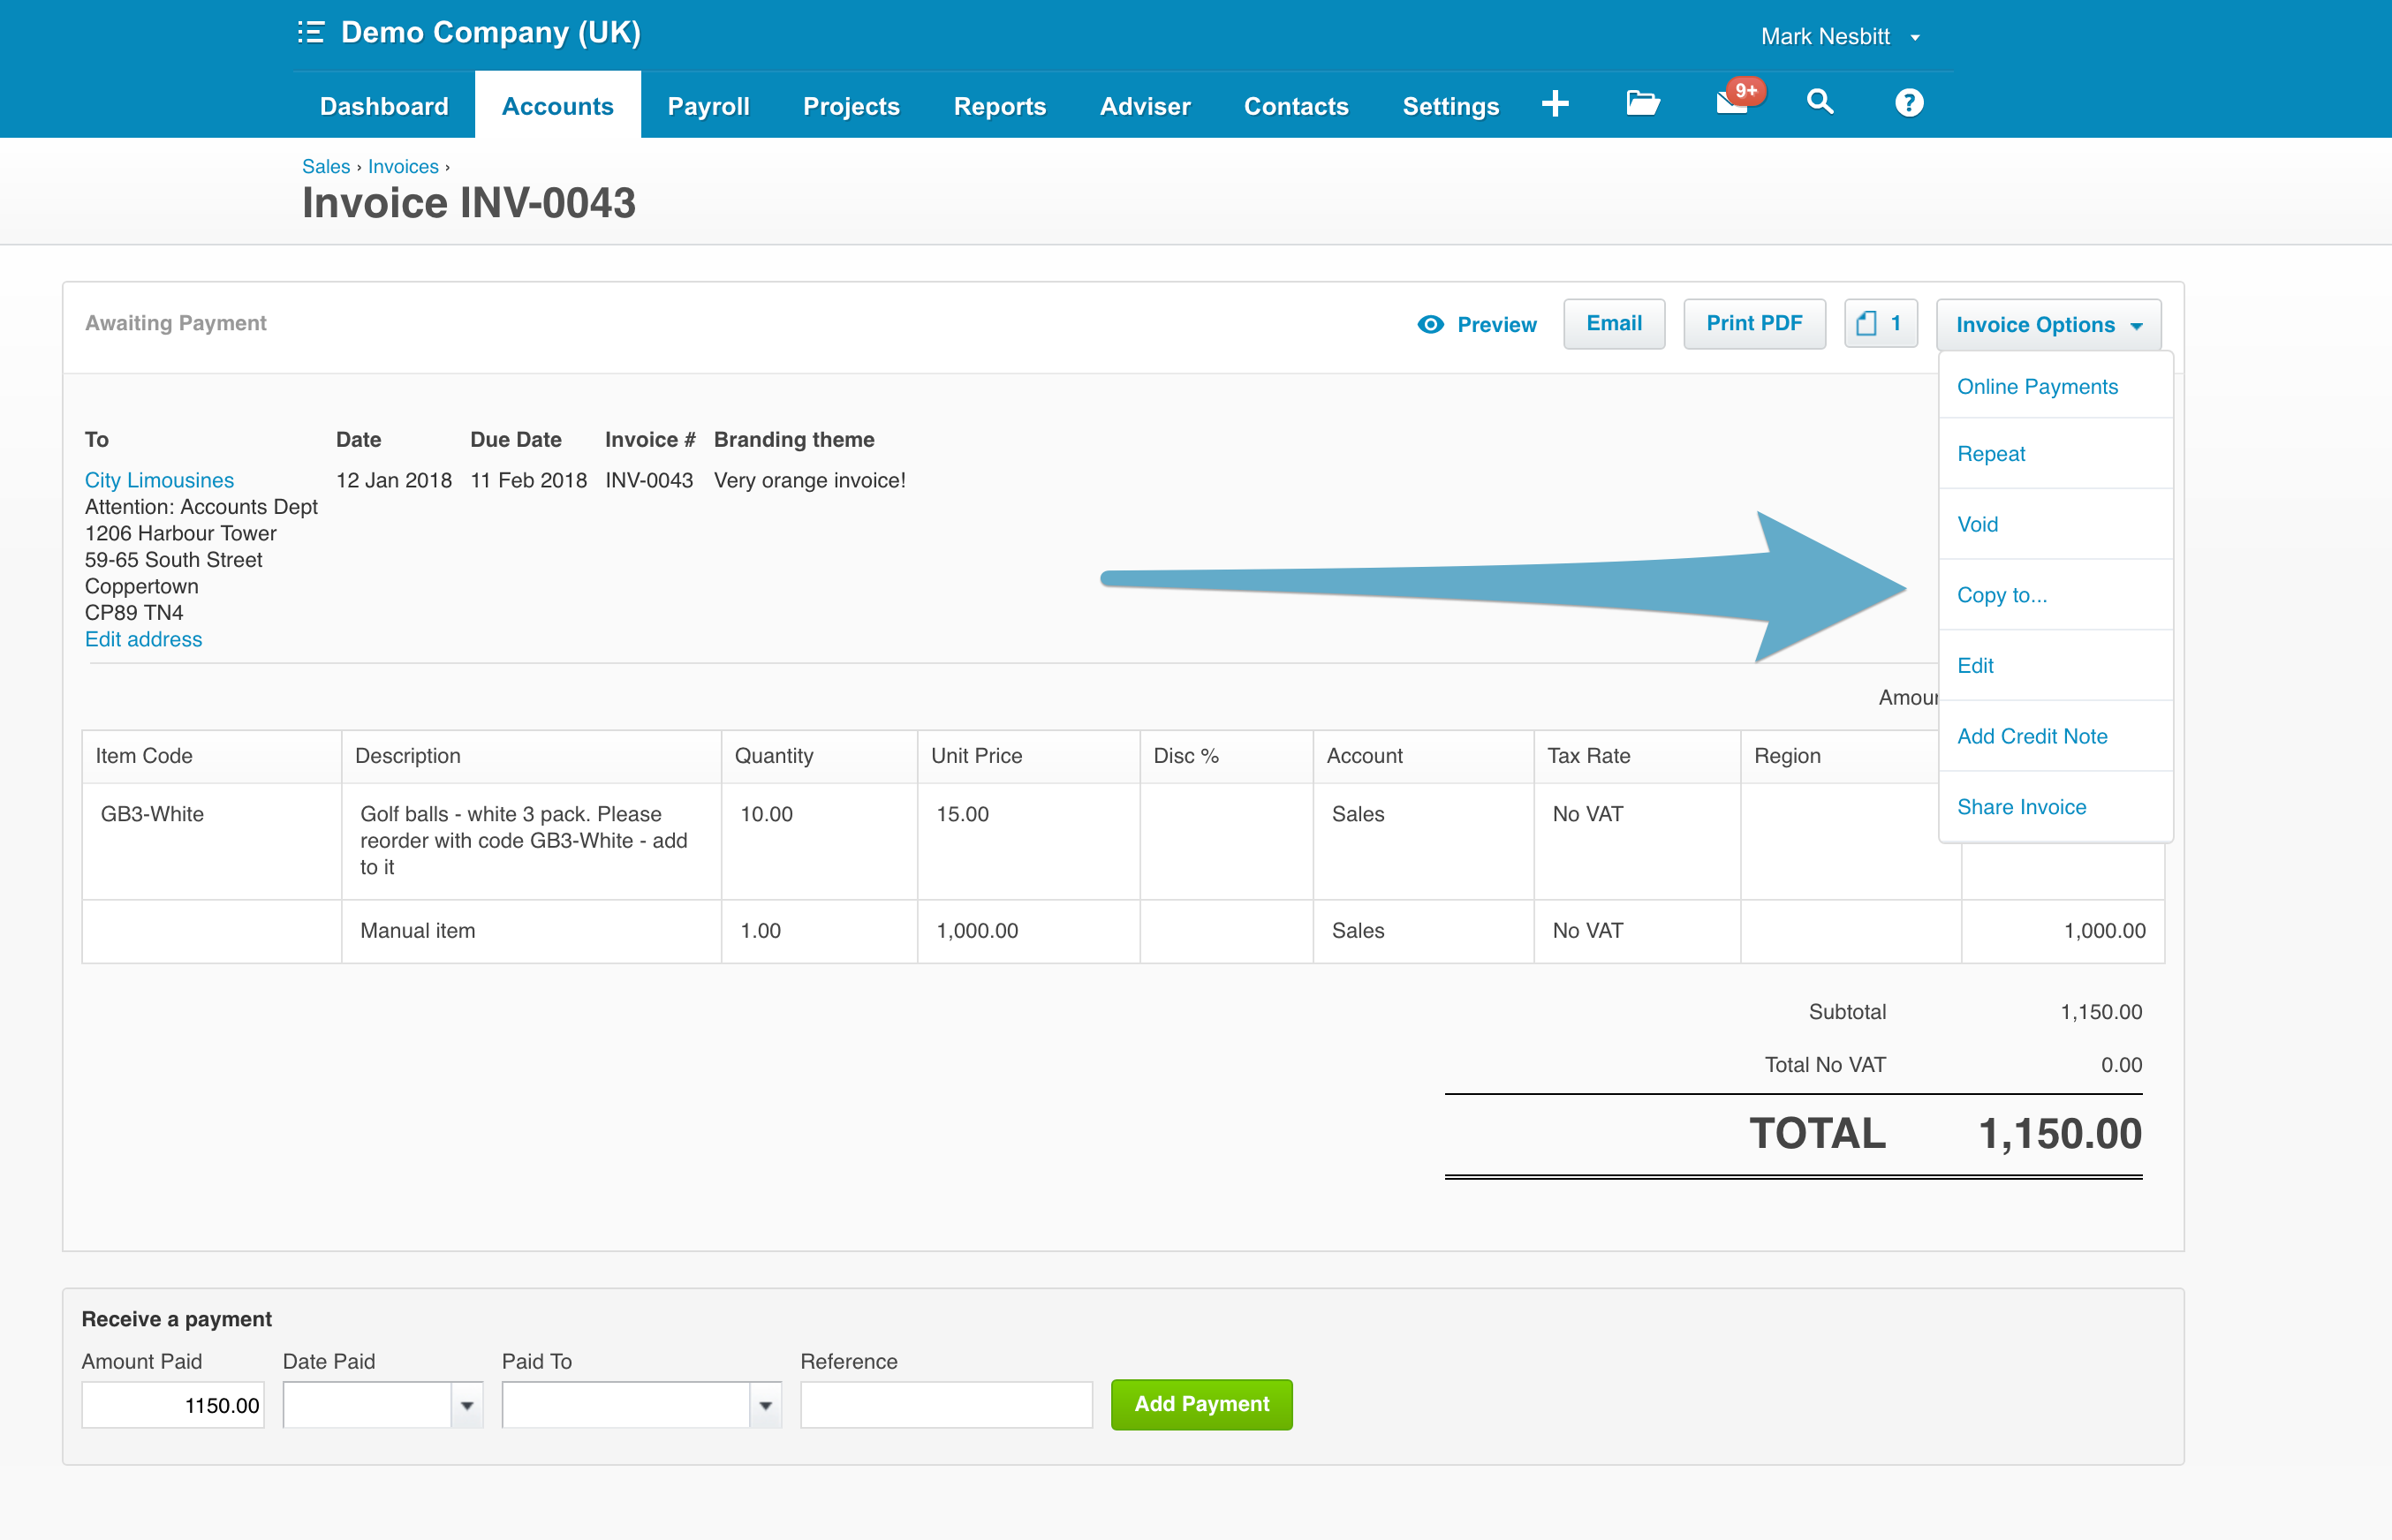
You’ll now see this screen and can enter the following information:
- To: Customer name (if you’ve already sent them an invoice, it’ll suggest that customer here)
- Date: The invoice date – usually today’s date
- Due Date: You can put in +6 for due in 6 days or what ever your terms are
- Invoice number: Is generated automatically and shouldn’t be changed
- Reference: Is only needed if you have a reference from your customer, or you can put anything in here
- Then add your services or goods sold:
- Description: Will be seen by the customer
- Account: Will generally be Sales – but you might have set up some different Sales categories (such as reoccurring income) – this is not seen by the customer
- Apply VAT if you’re registered
- Region: This will only show if you have tracking set up – this is a powerful tool for tracking different types of sale (by Region – for example)
- You can save as a draft, or Approve (followed by Email on the next screen)
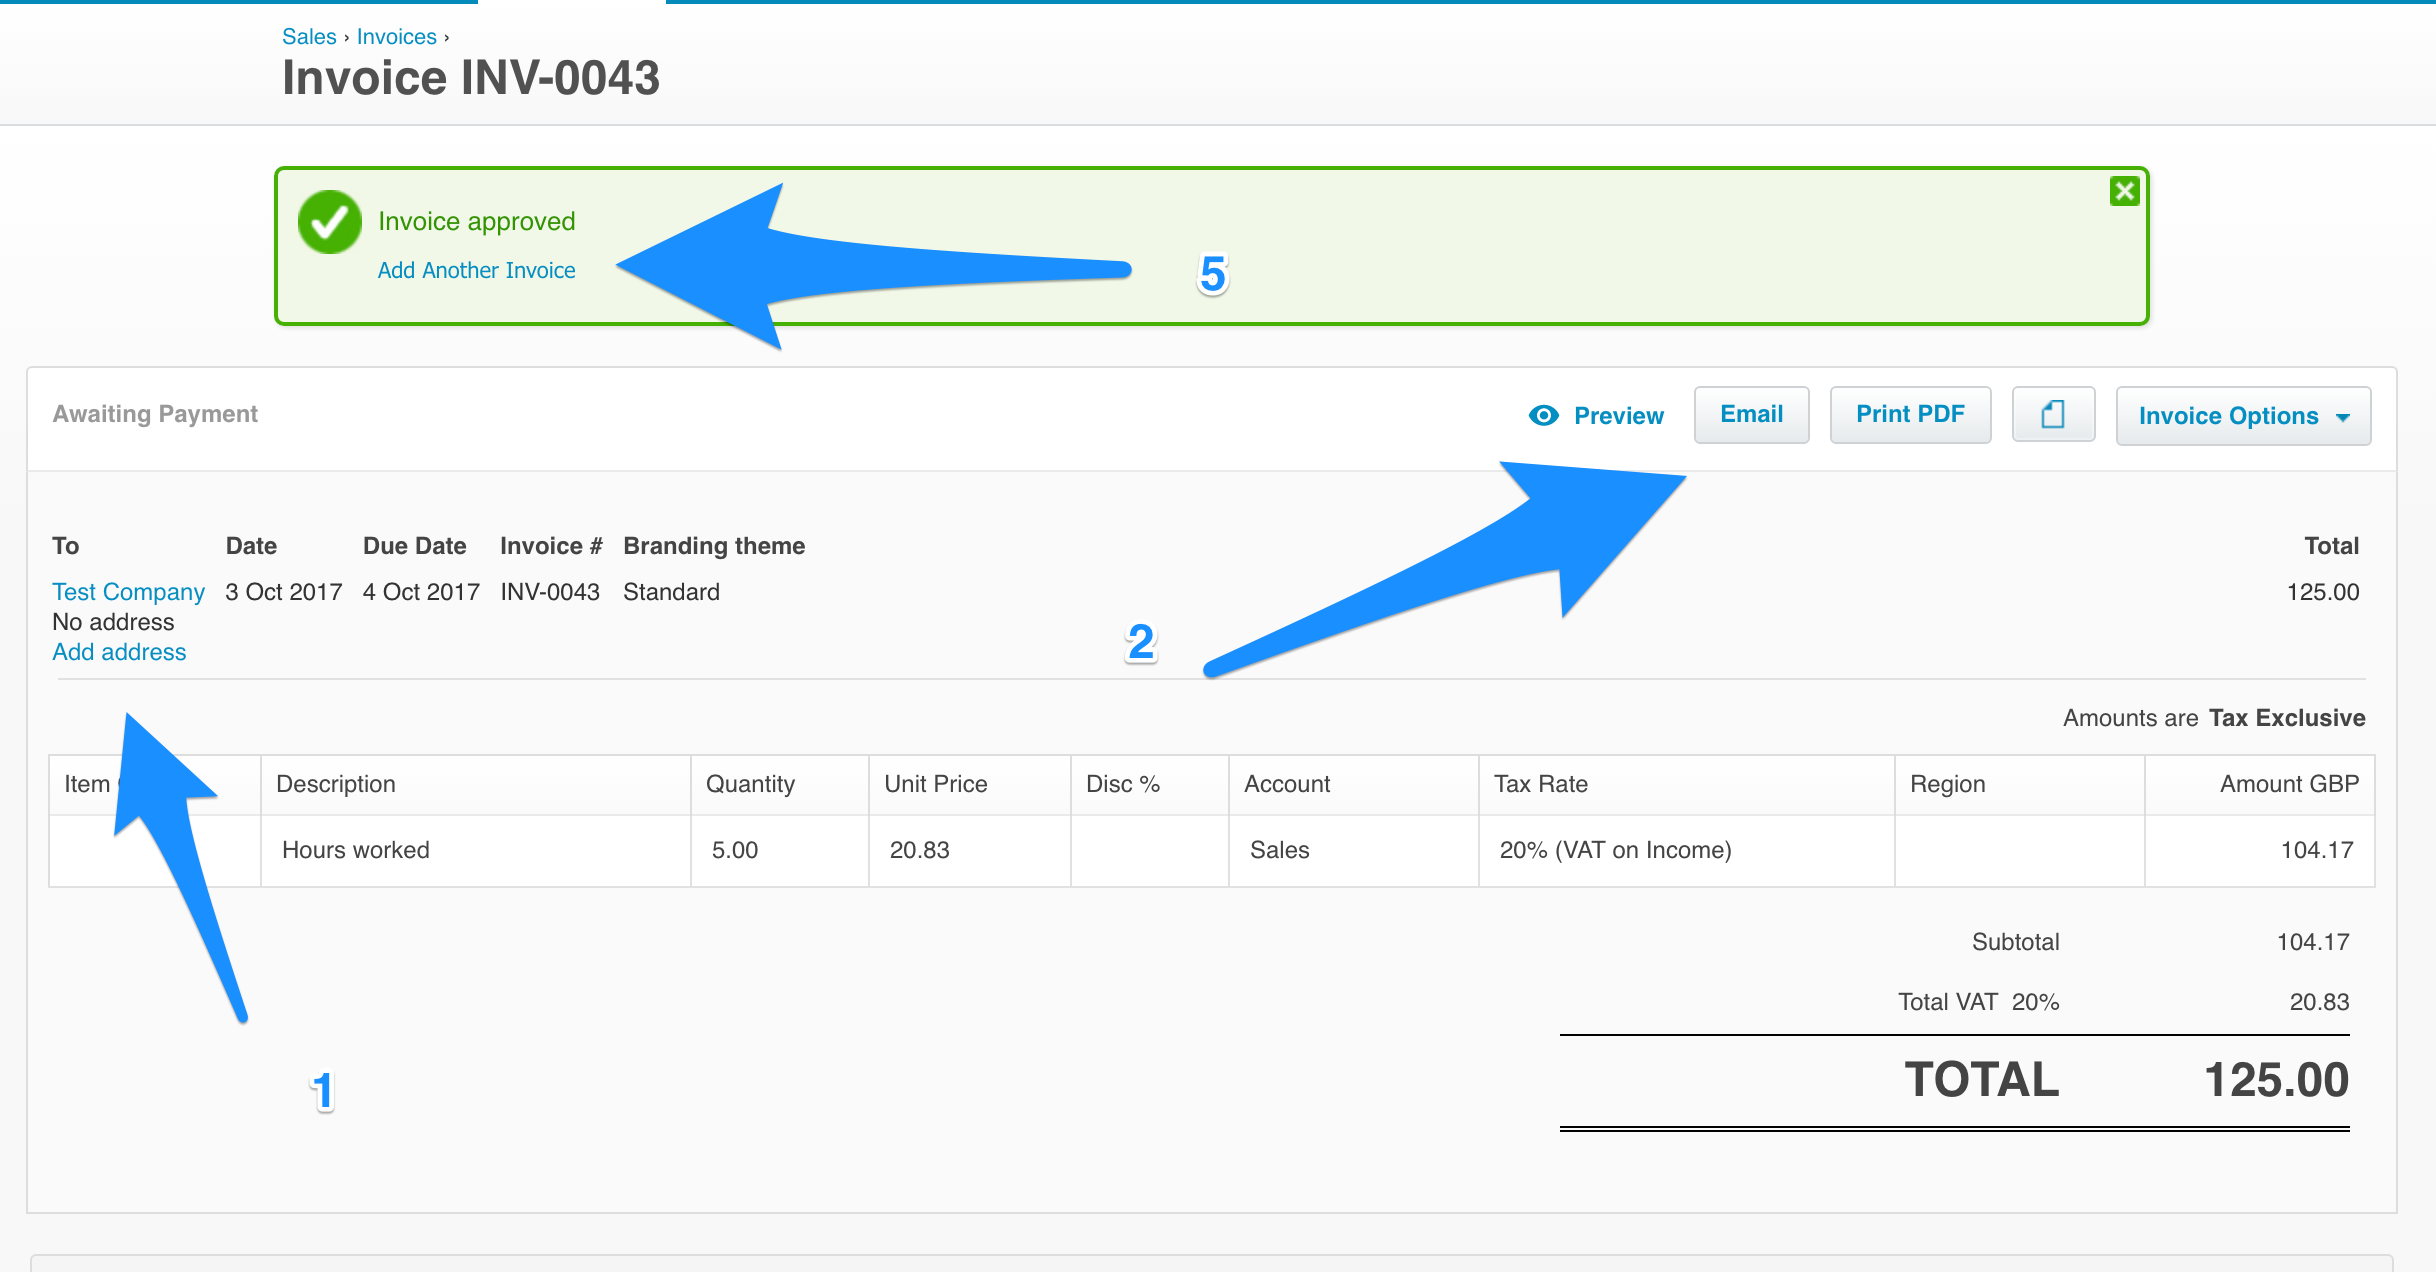
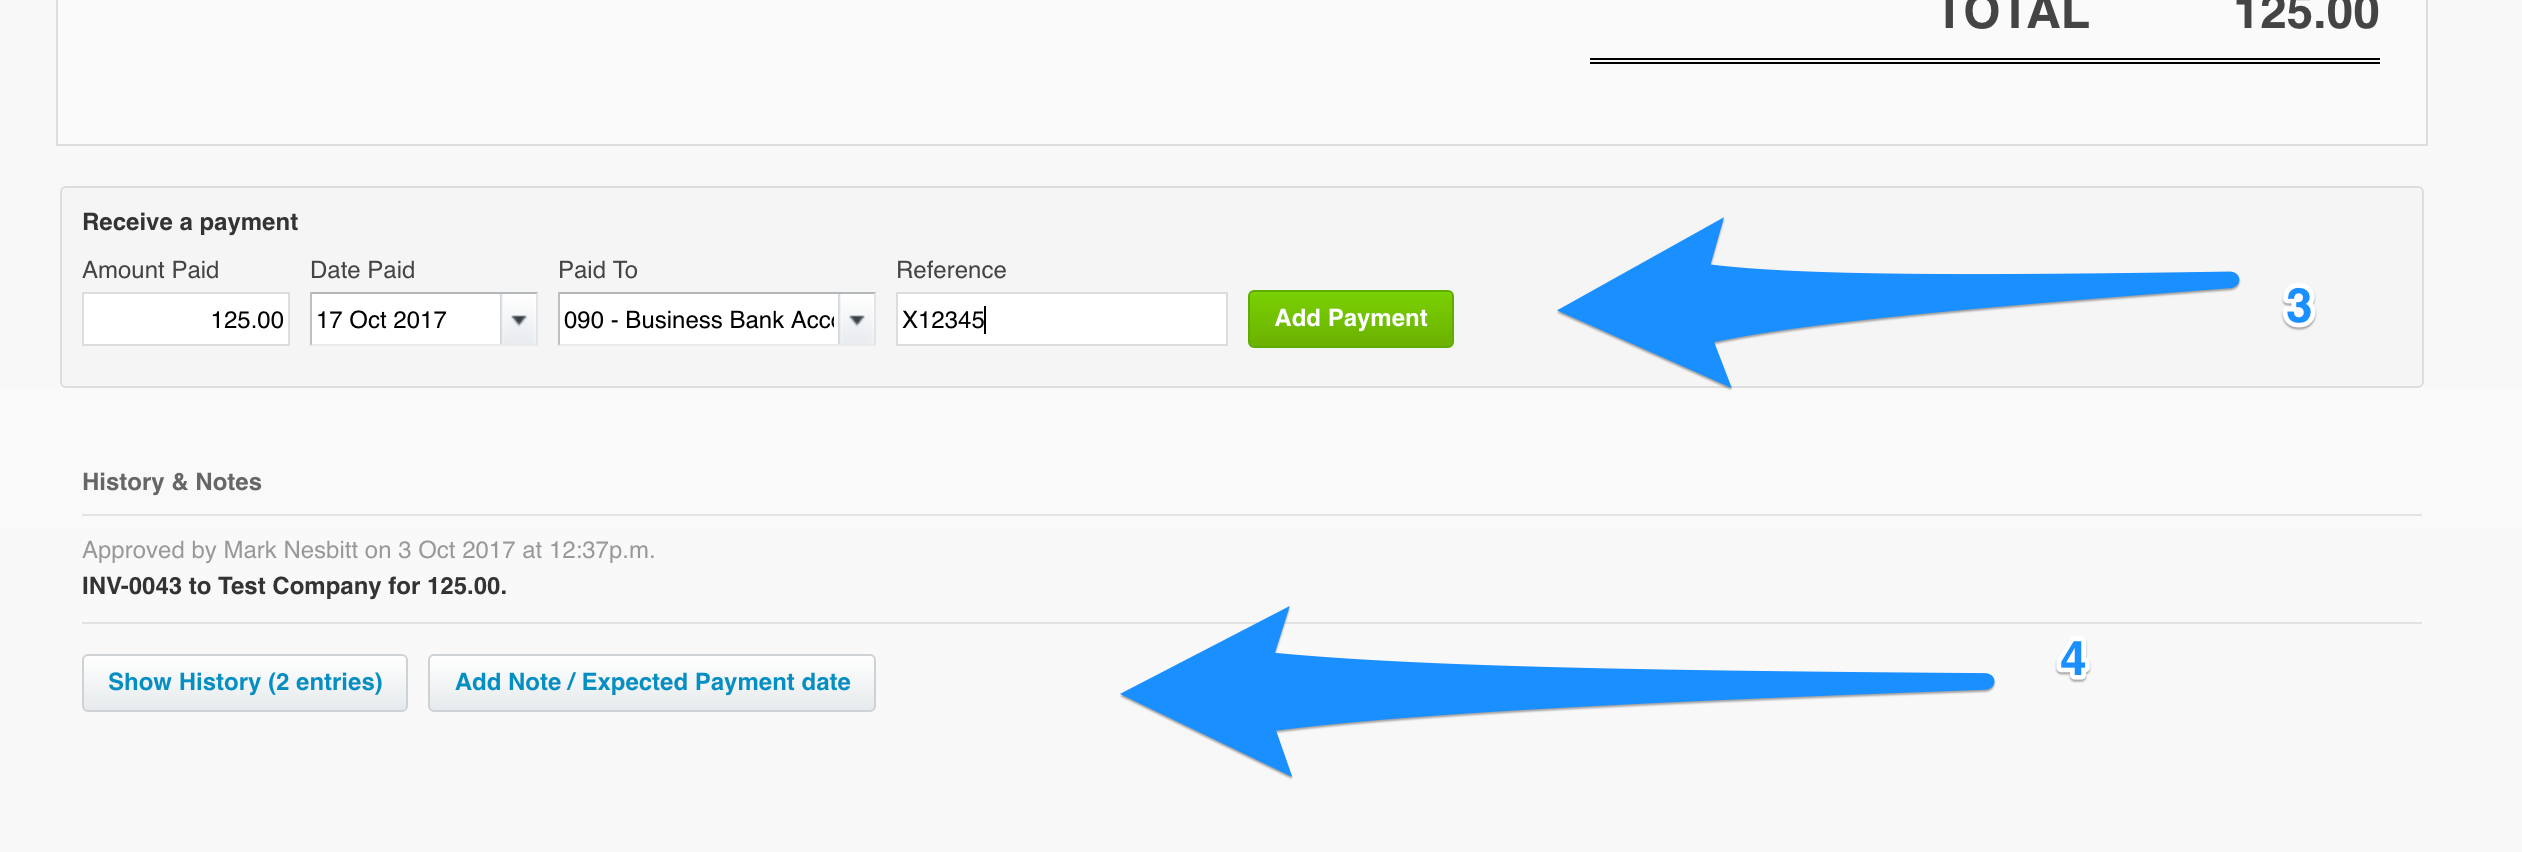
Once approved, you can:
- Add the customers address
- Preview, Email or Print the invoice
- Mark it as paid
- Make a note
- Create another invoice
Xero also has a useful help section on this subject: https://help.xero.com/uk/Invoices-Sales
If you’re regularly writing out the same descriptions or invoices, you have a few options.
- Use items – this allows you to set up descriptions and amounts for items or services you regularly sell.
- Copy a previous invoice – can be copied to the same customer or a different customer
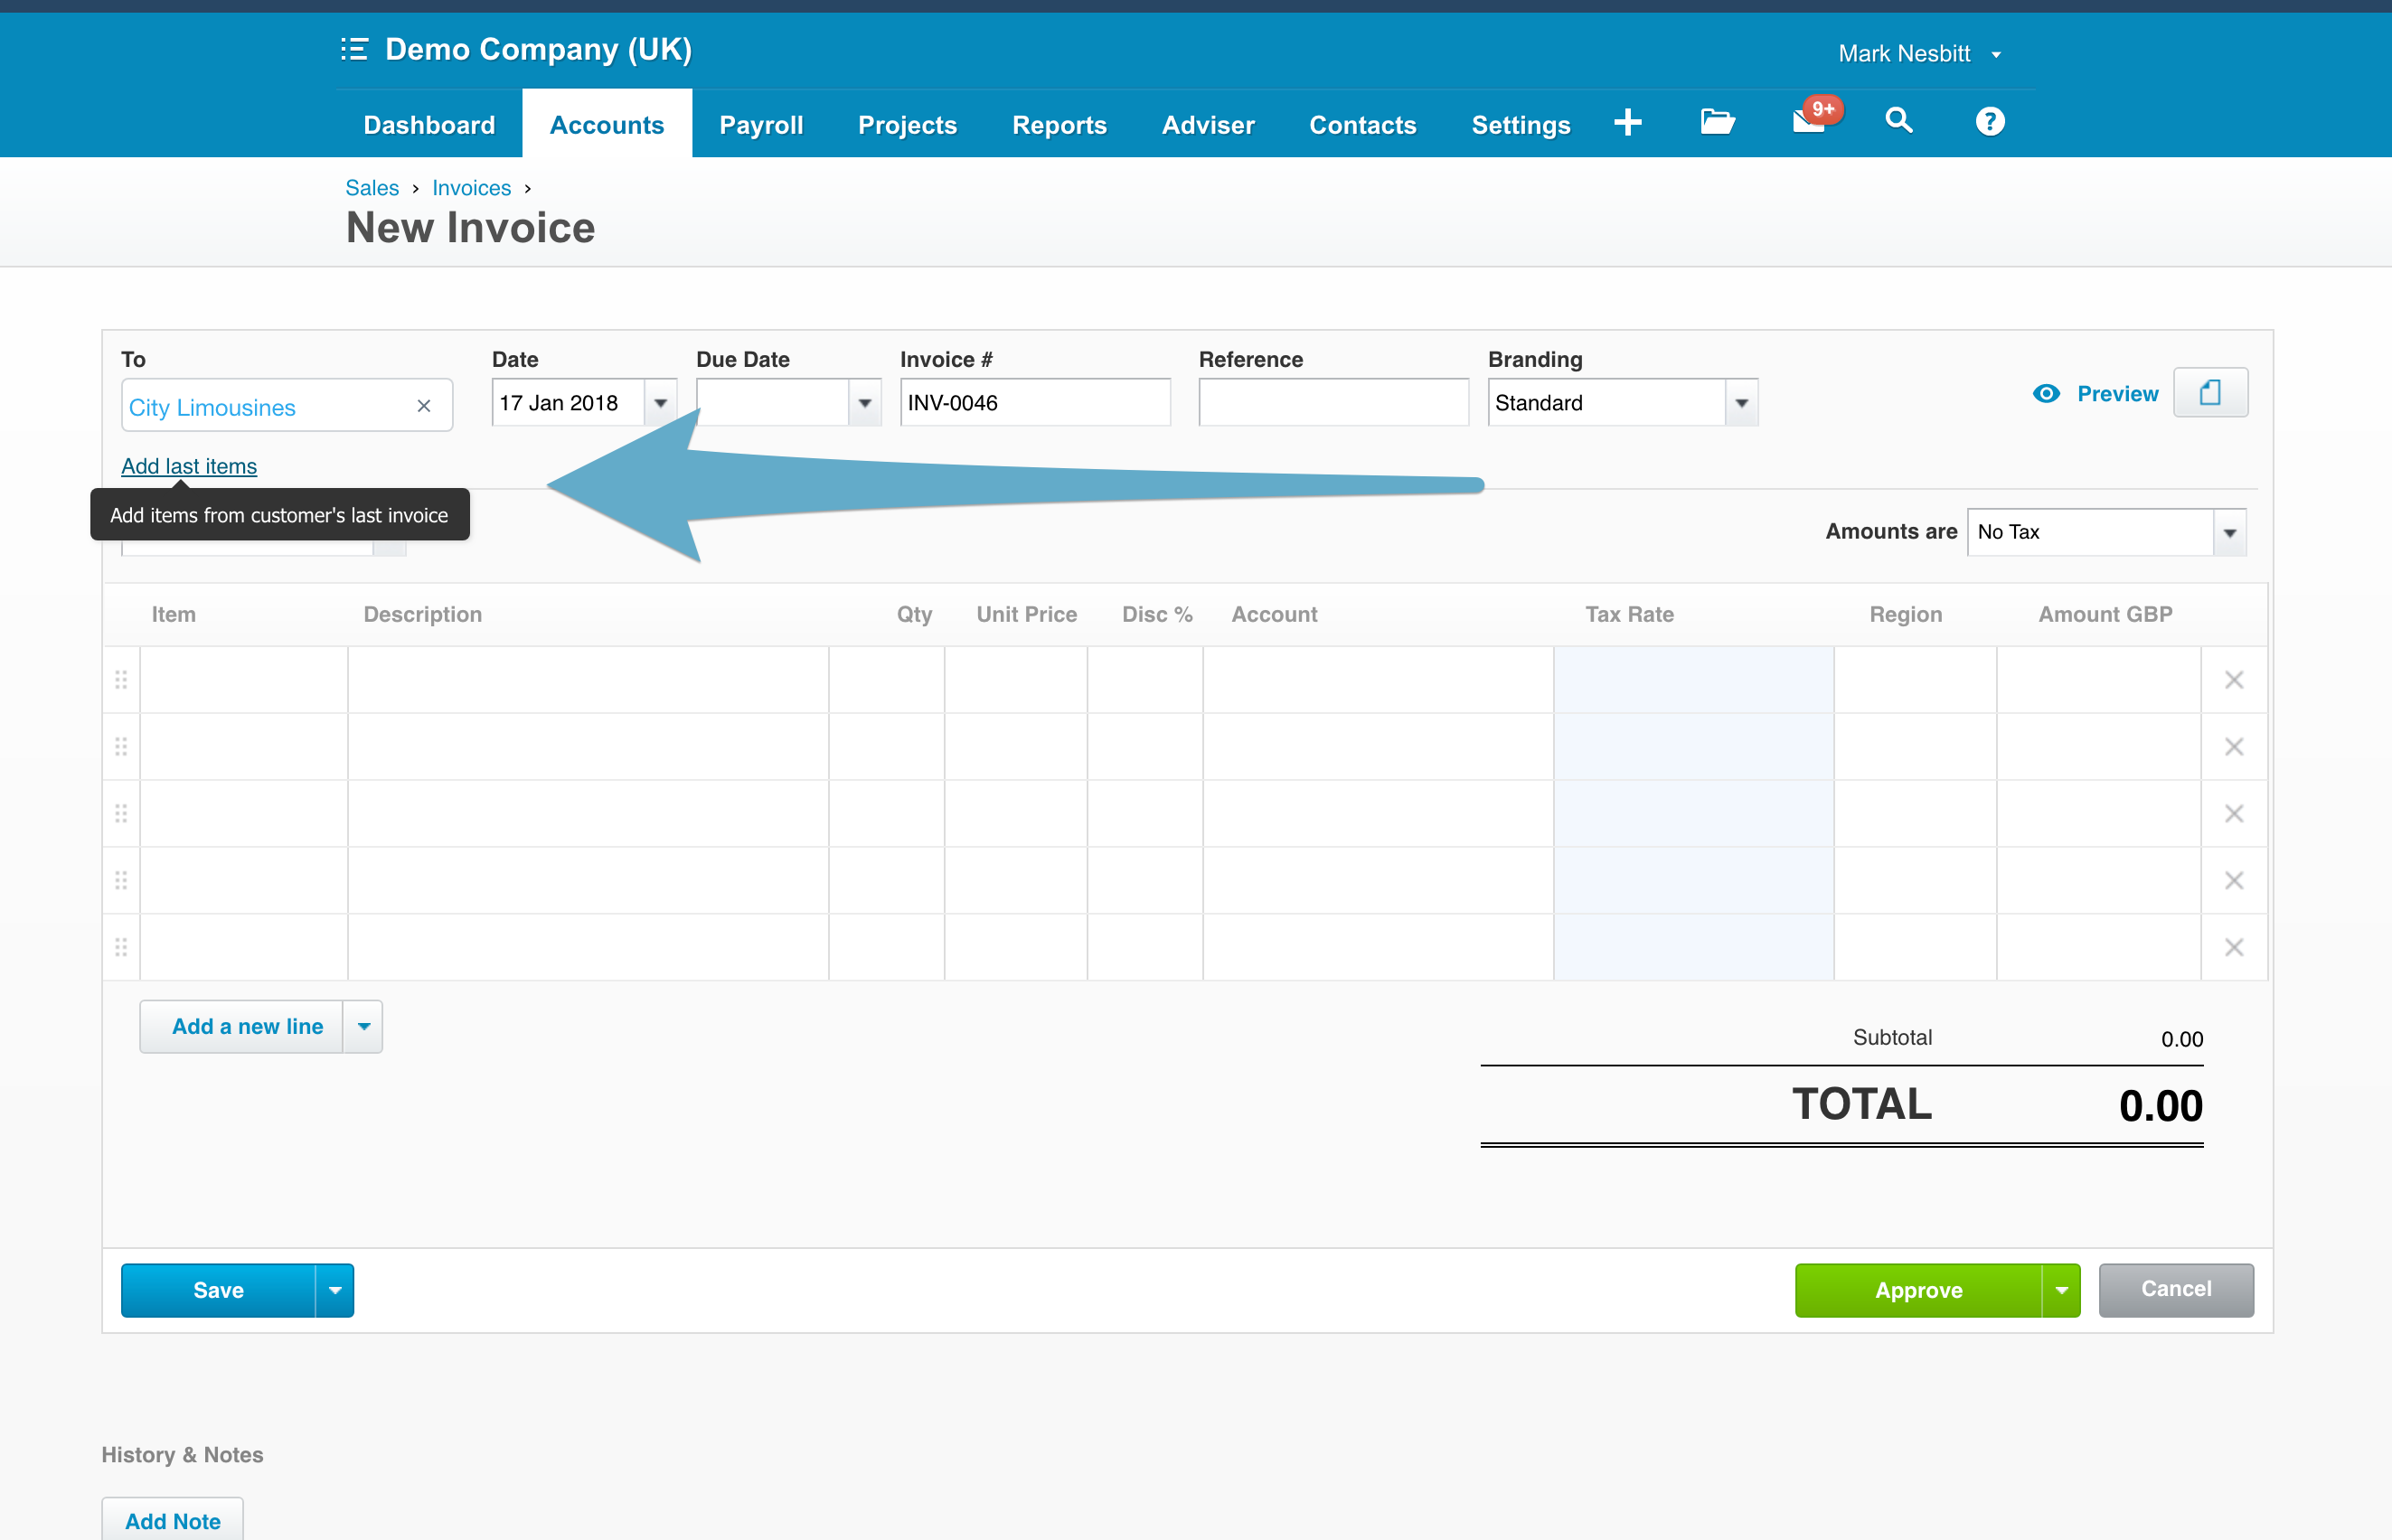
- Add last items
2. Go to the invoice you want to copy. Under options, click Copy to:
Enter the new customer’s name, then Copy: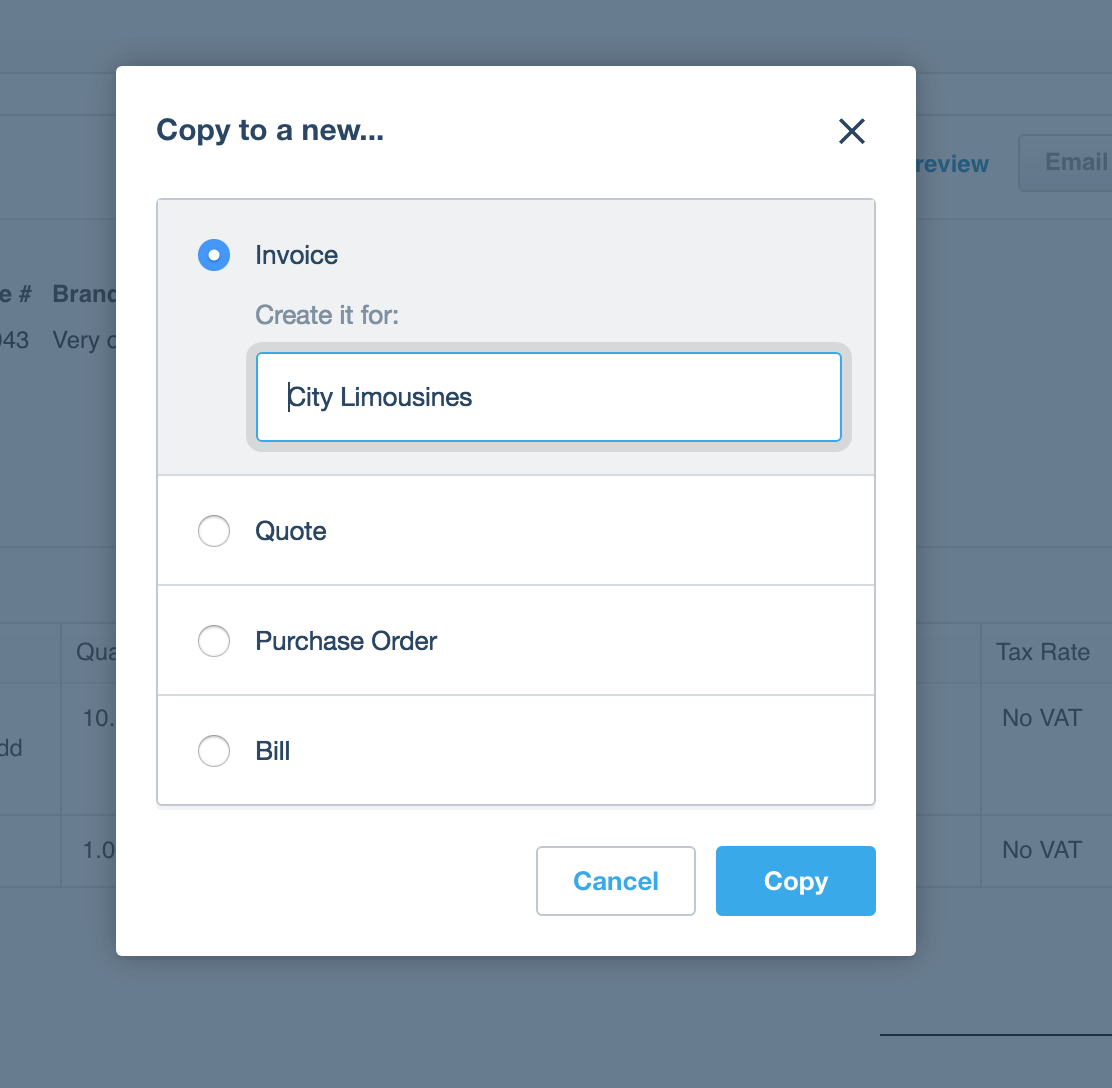
3. Add last items. Create a new invoice and enter in the customers name (To). If you’ve sent an invoice to this customer in the past, you’ll be able to copy the last items. Click “add new items”: